|
Please read through these instructions
before using the ELP program.
PLEASE
BE AWARE that with the new upgraded program, if your SafeList
stores or saves your previous message until you manually change
it, this version of Ezy-List Pro will APPEAR to wipe out an
existing message to avoid sending it during the TEST run. It
does not actually wipe it out, so don't panic if you see this
happening.
Okay,
let the fun begin...
Download the ELP demo
file (You will need winzip
to open the zip file).
Open the zip file and double click on "Install_EzyListPro_DEMO_x.x.exe"
(x.x is version number).

Click the OK button to proceed.

Click the Setup button to proceed.

After this point, ELP will be installed successfully to c:\EzyListPro
Go to your Start menu button on lower left corner of your screen.

Select Run.. (from Start menu).

From the Run dialog box, type in C:\EzyLostPro\EzyListProDEMO.exe
(or browse to the same file).
Click OK.

At this point, you'll see a splash screen while the ELP software
program initializes..
The ELP F.A.Q. page opens. You need to be connected to the Internet
when using ELP software.
Click on Activate! and select "Activate ELP" from
the menu.

Once ELP is activated, you'll see a login screen similiar to
below..
In demo mode, leave the Username, Password, and ELP Owner Name
fields alone.
Click the login button to proceed to the next step.

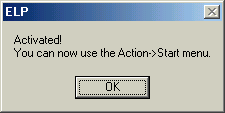
A message box will appear that says, "Activated! You can now
use the Action-Start menu."
Click OK.

The next step is to add your safelists..

The
rest of the instructions in this FAQ will use SpiderMailer Safelist
as the sample Safelist to show you how to add a list to your
Safe-List file. But they work for every Safelist you choose
to add, in exactly the same way.
If
you are a member of SpiderMailer Safelist, Click the LOGIN link.
Otherwise
click the SIGNUP link and follow the List owner's directions.
Then
come back to Ezy-List Pro and click the LOGIN link. (This goes
for any Safelist you belong to or want to join that's Ezy-List
Pro approved.)
The
SpiderMailer Safelist will open in a new window in front of
Ezy-List Pro.
HOW
TO ADD SpiderMailer to your Safe-List file.
Point
your mouse back to the Ezy-List Pro page and open the menu Safe-List,
at the top left-hand corner of the page. Select "Add Safe-List."
The
"Add a Safe-List" page will open. Where it says "Beginning
URL" copy/paste the URL you see on the SpiderMailer Login page.
For SpiderMailer the URL in the address box should end up looking
like this:

http://www.global-lists.com/mle/login.php?list=SpiderMailer&id=1606011897
Make
sure you don't have "http://" in the address box twice (remember:
it's already in the box by default, so if you copy the whole
URL from the site page, make sure you paste OVER the http://
in the box to get rid of the default.
Click
SET (the button at the end of the URL box).
A
replication of the Login page for SpiderMailer will appear with
a message box that says, "Is this the begin page you wish to
start recording?" Click Yes. If you are not at the Account Login
page for the Safelist you want to add, click NO and start over.
YOU MUST BEGIN THE RECORDING OF THE SAFELIST YOU WANT TO ADD
WITH THE LOGIN PAGE FOR EACH SAFELIST. You will get an instruction
message box telling you how to proceed.

Read
it carefully.

If
you understand exactly what it's telling you to do, then proceed
without further ado and forget about the rest of this FAQ (except
the part that says Enjoy Life!) If you are confused, then
follow along here, as you add SpiderMailer to your Safe-List
file.
Don't
worry if you forget the following instructions at any time in
the future, you will find brief directions at the top of each
page in the program instructing you on how to proceed.
OKAY,
here we go.
Point
your mouse inside the "User Name Box" and left-click once. A
message prompt will appear that asks, "Is this where you enter
your user name?" If you have your mouse in the right place,
click "YES." Otherwise click "No" and hit the Start Over button
above you to the right-hand side of the page.

Click
your mouse once again into the User Name Box and type in your
user name for this Safelist.
NOTE:
The program is not yet functioning to answer a "NO" question.
If you click "NO," the program will not understand your instruction.
So if you think you're in the wrong place, click the "START
OVER" button (located higher up on the page), to be safe. This
will bring you back to the "Add a Safe-List" page and prompt
you to enter the SpiderMailer Login page URL again.
If
this happens repeat this step (above) again, this time with
your mouse clicked inside the User Name Box.
Repeat
these steps, but this time point and click your mouse inside
the Password Box. You'll be prompted with a similar message
asking if this is where you enter the password. After you say
"Yes," click inside the box again and enter your password.

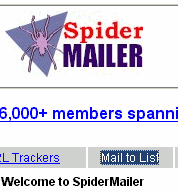
Click
the Login button. You'll see the familiar screen that lets you
"mail to the Safelist." Click on the "mail to list" link. NOTE:
each Safelist will use slightly different words for this function.
Just click on the link that gets you to the page where you can
send your message to the List.


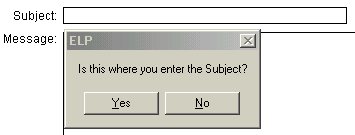
When
the page opens where you can write your message, click your
mouse in the "Subject" box. You will get a prompt message asking
"Is this where you enter the Subject?" Click "Yes." You will
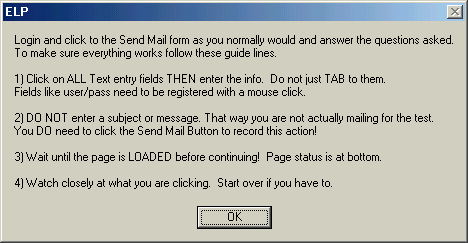
see a warning message, telling you NOT to enter a subject. Click
OK. Follow the instructions as the program tells you to. DO
NOT ENTER A SUBJECT HEADER.


Next
click your mouse in the Message. You will get a prompt that
asks, "Is this where you enter the Message Body?" Click "Yes."
Again, you will receive a warning NOT to enter any text. Click
OK. Follow the instructions as the program tells you to. DO
NOT ENTER YOUR MESSAGE YET.


You'll
need to click on the "Send Mail" button next..

Ignore this, and click ok..

You are almost done with adding your first Safelist to your
new automation tool (Hurrah!) Look up to the right-hand corner
of the page and Click the DONE button.

You
will be prompted to enter the User Name and Password that you
use for the SpiderMailer Safe-List. Enter the exact same User
Name and Password that you used when you logged in. The User
Name and Password are case sensitive, so enter them EXACTLY
as you normally enter them. Click APPLY.

A
TEST button will appear. Click the TEST button and WATCH CLOSELY
to see that the program has recorded your correct LOGIN information
and that it knows exactly where it has to go, in order to enter
your Subject Header and Message Text.


Regardless
of whether you have an existing Subject Header or whether this
space is blank, you will be asked, "Was a Subject Placed in
the Subject Field?" If it was empty when you started, you should
now see a placeholder that reads, "This is the subject." Click
"YES" if you see text in the Subject Header. Otherwise click
"NO," and the program will tell you it failed and prompt you
to start over by sending you back to the Add a Safe-List page.


NOTE:
Being sent back to the beginning is not a sign of failure. The
program goes back to the beginning to make sure it is recording
ALL of your steps accurately, otherwise it will fail, and then
you will be annoyed! So be patient if it tells you to start
over, or if you feel you need to because you got lost or confused.
After the first couple of times of doing this process, it will
be an absolute breeze and you'll realize what a godsend Ezy-List
Pro is in your busy life!
Okay,
the same step will happen with the Message text area as Step
18 except this time you'll be asked, "Was a Message Placed Placed
in the Message Field?" If it was empty when you started, you
should now see a placeholder that reads, "This is the message."
Click "YES" if you see text in the Message space. If there's
nothing there, click "NO," and the program will tell you it
failed and prompt you to start over by sending you back to the
Add a Safe-List page.


This message will show up next.. just ignore and click ok..

If
you are satisfied that the program has accurately captured all
the moves that you go through, to login and create and send
your message to the Safelist, click the SAVE button at the top
of the page. Give the file a name that you will remember. You
will get a message telling you that your Safelist has been added.
Click OK.


NOTE:
The program now remembers the last User Name and Password that
you used to create the previous record. So when you go to add
the next Safelist, at the place where it prompts to you apply
your User Name and Password again (SEE Step 17), it will show
what you recorded the time before. If you use a different name
or have a different password, clear the information from the
boxes and enter the correct information. This information should
ALWAYS match what your login information is for each Safelist
that you want to add.
NOW
IT SHOULD BE A PIECE OF CAKE TO KEEP ADDING MORE SAFELISTS TO
YOUR FILE! <big smiley faces should be breaking out about
now>
All
rightie...more than halfway there!!
Go
to the next menu, "Advertisements" and Click once. Select "Ad
AD." This part of the program is self-explanatory. Pick a name/title
for your ad.

Type in your Subject Header and your Message, and Save. If you
want to modify your Message at any time after you've saved it,
select "Modify Ad" from the same "Advertisements" menu. You
may write and save as many Ads as you wish.

When
you're ready to do your mailing, go to the "Action" Menu and
select Start Mailing.

Simply click ok on the next window (if ad looks good to you)
to begin mailing!
If you don't have any Ads in your Ad file, the program will
tell you that you haven't created any Ads yet! Smart program,
eh?; it won't send out a blank Ad, that would annoy your List
owner! If you have more than one ad, you'll have to select the
one you want to use. Then that ad will be sent to all the Safelists
in your file. You will see the Login pages for each Safelist
open, exactly as they did when you were setting them up in your
Safe-List file. The program will be done in a few minutes, depending
on the speed of your Internet connection.
The
"Options" menu gives you a choice of skins to personalize the
look of your program and allows you to set the timeout for connecting
to your Web Pages.
And
that's it, pretty much. Isn't this the coolest program you ever
saw for this type of task? Doesn't it totally take the grind
out of everything and allow you to feel your dreams of the Bahamas
or the Himalayas--whatever takes your fancy--come right up close
with their invition to you to go visit them? Now, with Ezy-List
Pro, it will be possible to take that vacation you've been looking
forward to. Think of all the extra money you start earning because
you're reaching more people more quickly and all the free time
you'll start finding you have, since Ezy-List Pro is doing all
of your listwork for you!
Enjoy
your new Ezy-List Pro© Program! ENJOY Life!
FAQ
created by Shelley Souza
and Trey Koehler.
|